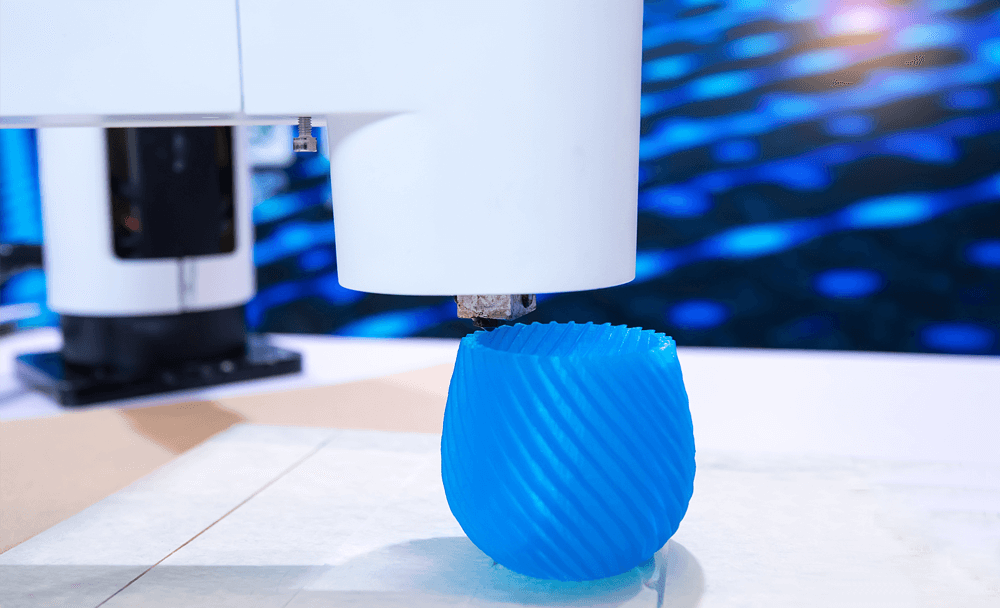
In a 3D printer, the print bed is a surface on which the print head places the model that is being printed at that moment. The print bed always needs to be flat surface and clean. Since it is an essential part of a 3D printer, it must always be a clean and flat surface. 3D prints fail for multiple reasons, but one of them is the dirty print bed of a printer. The printer bed has a significant impact on the results of the print. Cleaning a print bed makes sure that the print comes out perfectly. Improper cleaning of the print beds can also result in damaging the print bed itself.
After every print, the print bed needs to be cleaned so that no residue is left on the print bed and it will not affect the quality of future prints. The residue of materials of the previous print can mix up with the new materials, if not cleaned properly, and then can prevent adhesion of the next object in different parts and can completely ruin the results of the objects. The layer adhesion of the prints can only be improved if the printer is clean and the first layer of the model turns out to be better looking because of it. The bed adhesion is reduced due to the dirty printing beds and due to that the printed parts of the model don’t stay stuck to each other and the whole model can fall apart because of it. Material, as well as time, is wasted because of this bad spare.
Removing dust, oil, grime, and residues from the print bed is very essential. Although, it is a very tricky and complex process. All the things that can affect the printing quality including fingerprints, oils, etc. should be removed by using a microfibre cloth, paper towels, and cotton to clean the bed surface. Light staining like dishwashing detergent, water, Isopropanol, and glass cleaner can also be used depending upon the amount and type of residues. But on top of all of this, this needs to be made sure that these materials don’t harm the printer bed itself and that no scratches on the print bed can be afforded.
How Often Should Be Cleaning of 3D Printer Be Done?

There is no fixed answer to this question because it depends upon the usage of a 3D printer. If the printer is being used heavily or you can say regularly, then you might need to set a fixed schedule for the cleaning of the 3D printer. It will be effective to set a time in a week when the print bed will be cleaned. It will increase the bed adhesion and there will be a huge difference in the results of the prints. Other than that, if any filament or a leftover adhesive is seen over the bed print, then it should be cleaned that very moment before starting the next printing to avoid bad results. If the printer is not been used for a long time then it should be cleaned before printing because it might have dust on it which can affect the quality.
How Often Should Be Cleaning of 3D Printer Be Done?
Choosing the right surface for printing is also a very important factor because different surfaces require different kinds of maintenance and cleaning of the beds.
Polyetherimide Printing Beds (PEI)
PEI, also known as Polyetherimide is mostly used in 3D printers and are adhesive sheet. These print beds require very less maintenance and are very suitable surfaces for 3D printing. They are temperature and radiation-resistant and became popular because of their good bed adhesion. They don’t usually stick to the prints because of their nature but only if they are maintained properly and are cleaned regularly when any residue is left. There are very few prints in which adhesives and tapes are required when using the printer. Overall they are maintenance-free and do not need extra efforts to maintain the quality of their prints.
The adhesion of the surface is reduced every time they come in contact with temperature, radiations, 3D printing inks, and general handling. PEI sheets are also meant to be replaceable and the bed adhesion might not be avoided sometimes despite all the maintenance and cleaning. It is quite practical to analyze that when the bed adhesion is noticed or after a certain number of times it is used, it needs to be replaced.
How to maintain PEI sheets?
The maintenance and when to clean the PEI sheets depends upon the company of the printer and how often the printer is being used. It is recommended to clean the PEI bed after every use or after a few prints because that will maintain the bed adhesion. The more intensive the printing, the harder it will get to clean the 3D printer bed depending upon the type of model that has been oriented and what material was used in them. Whenever it is noticed that the printer bed is less sticky than usual, then it is recommended to clean the surface before starting a new print.
Before maintenance, it is be made sure that the bed of the printer is cooled down and the maintenance is not started immediately. For PEI, using unscented Isopropyl alcohol is safe to use. The IPA should be 70% concentrated only so it does not harm the sheets. After cleaning, IPA evaporates so there is no worry about the mess that can be created because of the alcohol, but it is still recommended to clean the sheets after removing them from the printer.
The higher concentration of the alcohol can completely dissolve and removes the oils and grease if the beds are wiped from it. Acetone can remove the residues of ink and plastics, but it needs to be used with extra care. Using Acetone directly on the PEI print bed can damage the print bed so you should always use it with a cloth to dampen it. With Acetone, you can wipe the bed in circular motions gently so that no damage is caused to the print bed.
Glass Made Print Beds
Glass is also a very common material for the surface of print beds. The life of glass print beds is longer than that of PEI as the bed adhesion lasts longer and the replacement is required after comparatively a longer time. It facilitates more material than PEI because 3D print not sticks to the bed or react with the surface. After all, it is of glass and glass surfaces are easy to clean as the residues can be easily wiped off and they are also heat resistant so the surface is not damaged by the high temperatures.
One of the drawbacks of glass print beds is that they are not adhesive but additional adhesives are used with them such as glues and hair sprays. Because of these adhesives, a good base layer is formed for the model, and a better first layer is printed.
How to maintain Glass print beds?
One of the most popular ways to clean a glass print bed is scrapping. It is recommended that after every session the print bed should be scrapped. This is to avoid all the residues on the print bed. Mostly the print bed is heated until all the residues on it break down, become soft, or are at the stage where they can be easily wiped off. Although, extra care is needed with scraping because any sharp material can cause scratches or can damage the print beds. Sometimes they are scraped off as soon as the printing is done so that the residual build-up can be avoided initially.
For scrapping, the first thing that should be removed from the print bed is the additive adhesives which can be glue or hairspray with the help of a metal spatula. After that, the material residue should be removed from it which is mostly done with blades. If you want to avoid blades or any sharp objects, then you can try to remove the residues and adhesives with soap and water. Soap and water can also be used to get rid of adhesives because hairspray and glue are soluble in soapy water and can be easily removed. If the water used is warm, it will become easier because the filaments will become because of the temperature and can be wiped off easily.
There are some cases in which it is harder to remove the residues with just water and soap because of their high density so they can be removed from Acetone or Isopropyl alcohol because they will be soluble in them. Choosing between the different agents can depend upon the residues that need to be removed. The isopropyl alcohol used should not be less than 70%b concentration. And if the acetone is being used for cleaning then it should not be directly poured and left on the sheet instead, it should always be used with a cloth to dampen it and avoid the print bed from getting damaged.
Adhesive Tape Print Beds
Adhesive tape print beds are mostly used by manufacturers that are just getting into 3D printing because they are easy to use and but the maintenance is a little harder. Adhesive tape beds are comparatively very cheap than PEIs and glass print beds. They are easily replaceable and the new ones are very cheap so almost every manufacturer can afford them. It is a good option for people who want cheap yet reliable 3D prints. Commonly there are two types of adhesive types used that is masking tape and painter’s tape. There are many more types of adhesive tapes but these two are the most reliable choice by most manufacturers.
One of the drawbacks of adhesive tape print beds is that they can’t resist high temperatures so they are not used for such printings that have the materials that require high temperatures. Another drawback of Adhesive tape is that they mostly get peeled off with the prints when the models are removed from the printer, so they need to be replaced regularly after almost every printing. They are easily available in the hardware stores so they can be easily replaced.
How to maintain Adhesive Tape print beds?
Adhesive tapes are comparatively harder to maintain because it needs to be done very precisely. Mostly a metal spatula is preferred to remove the filaments from the tape. The scrapping should be done very gently so that the tape is not damaged or torn off. Mostly tapes are peeled off with the prints so there might be many places that you will notice while cleaning where the tape will be torn off so you will have to gently patch that area. The parts from where the tape is torn are mostly the parts that have comparatively more movement than the other parts.
If the surface is no more even, looks used, or the tape is torn off of a longer area then you need to replace the tape with the new one. For that, the tape is peeled off from the whole surface or the whole layer of tape and then replaced by a new layer. The surface below the tape needs to be cleaned and the residues are removed by soap, water, or different materials and then after that, a whole new layer of adhesive tape is applied. The tape should be placed with extra care so that no air bubble is left and the surface is as even as it can get.
After reviewing all the factors, you might now have understood that you should clean the print beds regularly after every session of printing. There are different ways from which you can always make your printers clean including scrapping or using sandpaper, dishwashing soaps, detergent, and glass cleaner with the help of soft cloth like microfiber. If the printer is used more often than a scheduled clean up should be done on the print bed every week otherwise the residues will stick to the printer bed and deep cleaning is required otherwise the results will be affected. Now you should know how you can efficiently clean your print beds to get high-quality prints and avoid the risks of failure of prints.